Showing posts with label Steampunk. Show all posts

Monday, September 23, 2013

Grim's IMC Prize Support

The IMC has come and gone…
As prize support for the IMC I put a few weeks of nightly paint sessions into these guys and they were finished just in the nick of time.  I finished these three at 2:30AM Sept 14th, giving me just enough time to sleep for approx 4 hours, and spend the entire day at the Intermountain Cup.  I had a good time at the cup, and was glad that we were able to provide some prize support for this enormous event.
Here is a pic: I hope that the person who won these in the raffle enjoys them.


Thanks for Watching!
-Grim

Friday, March 1, 2013

Grims IMC WIP 2

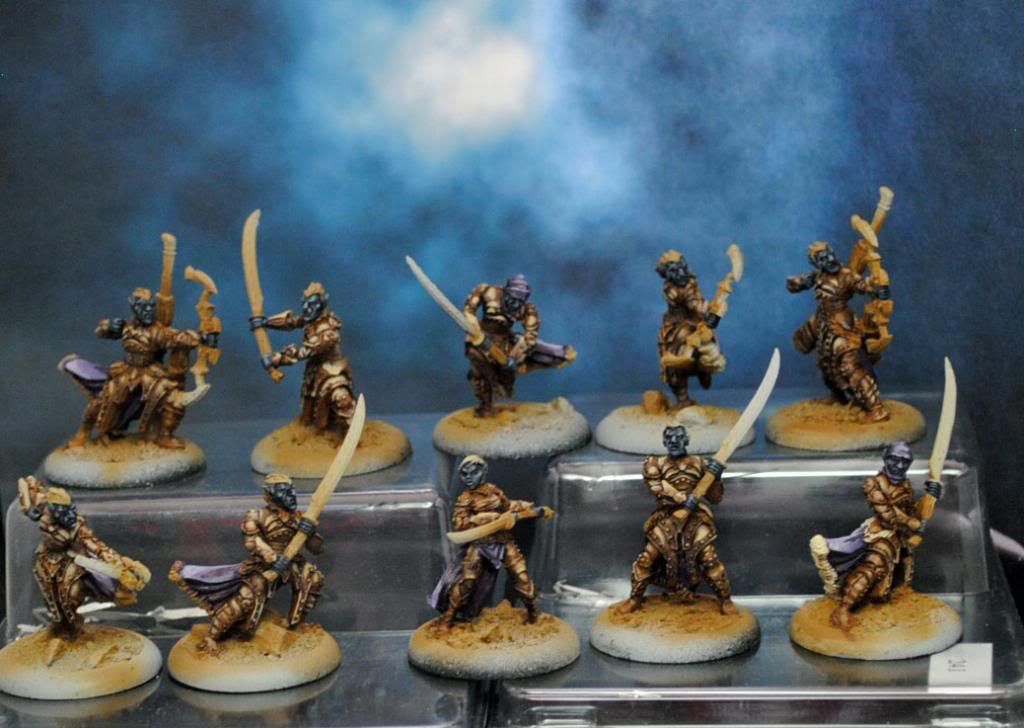
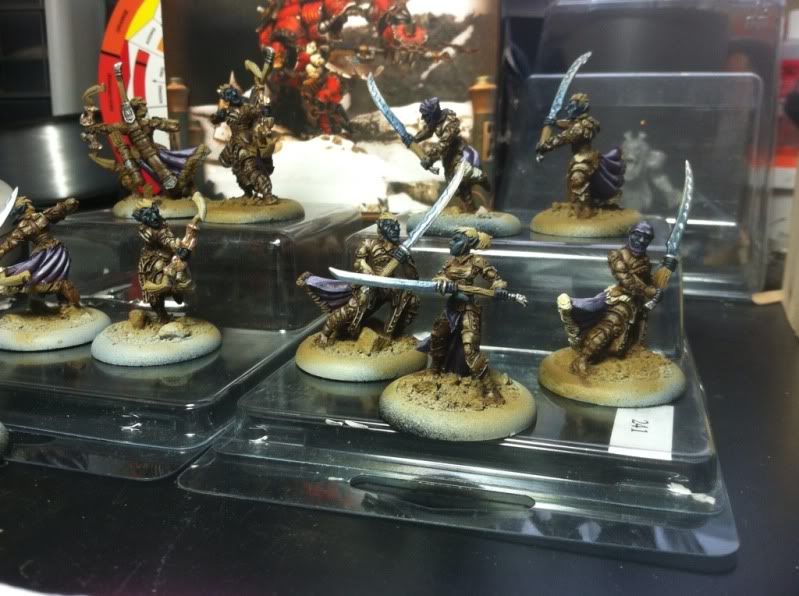
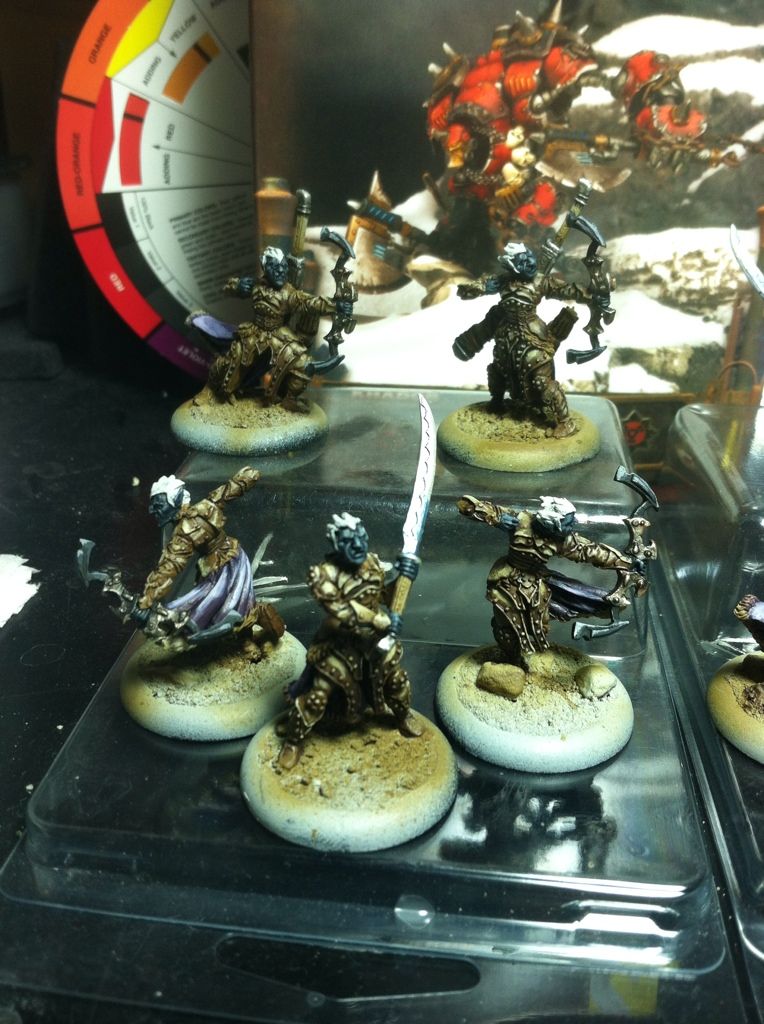
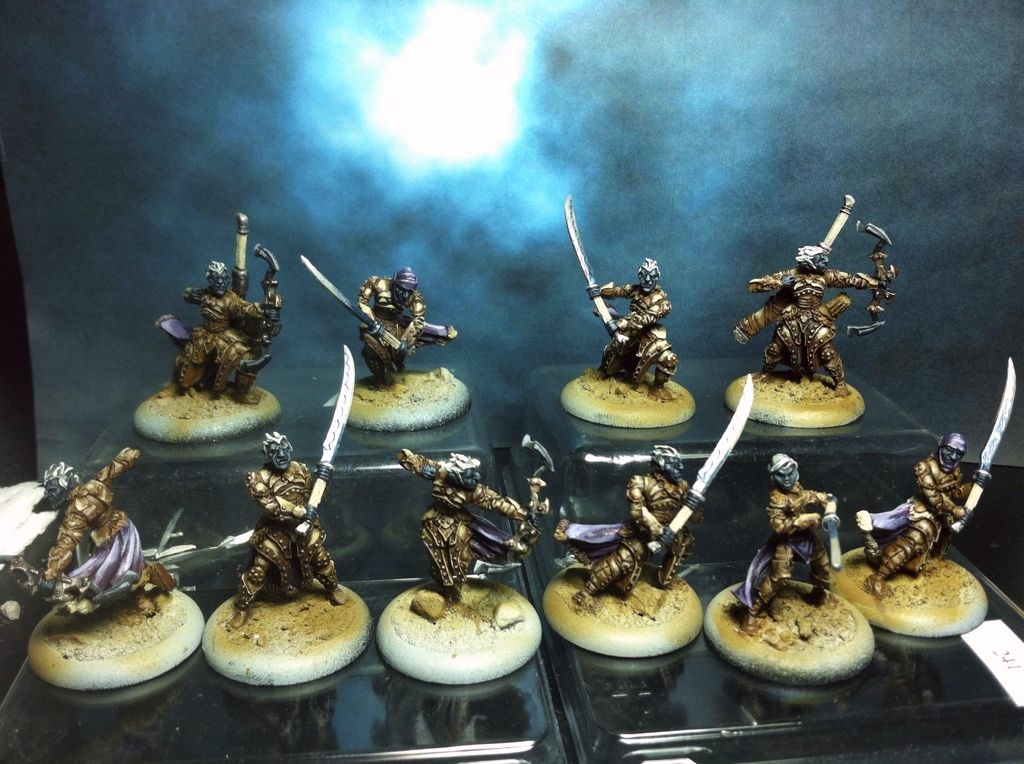
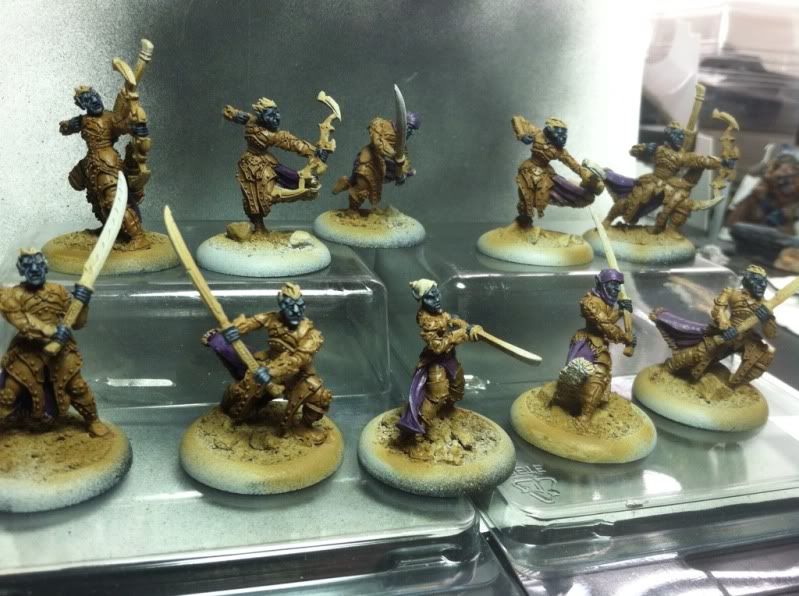
Alright everyone here is a quick little WIP of my progress thus far my my Drow....errrrrr Nyss Hunters.  :)


More pics when you click :)


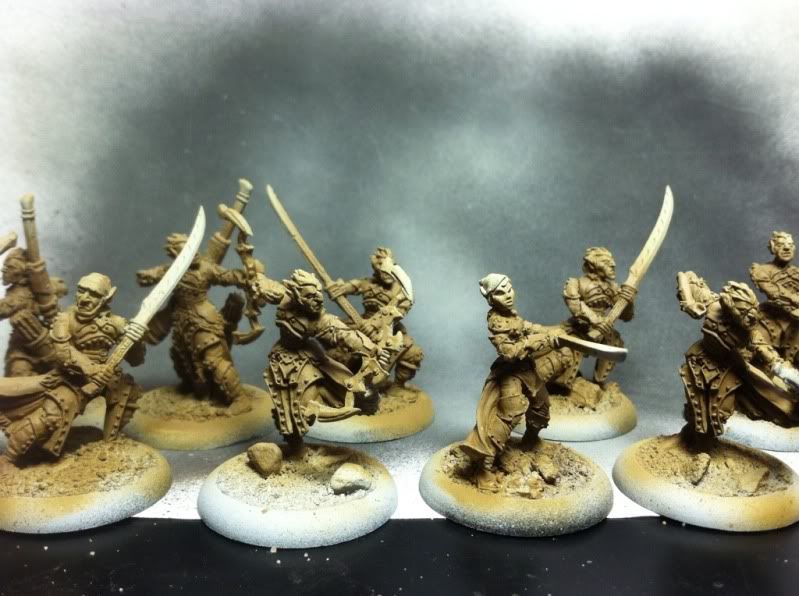
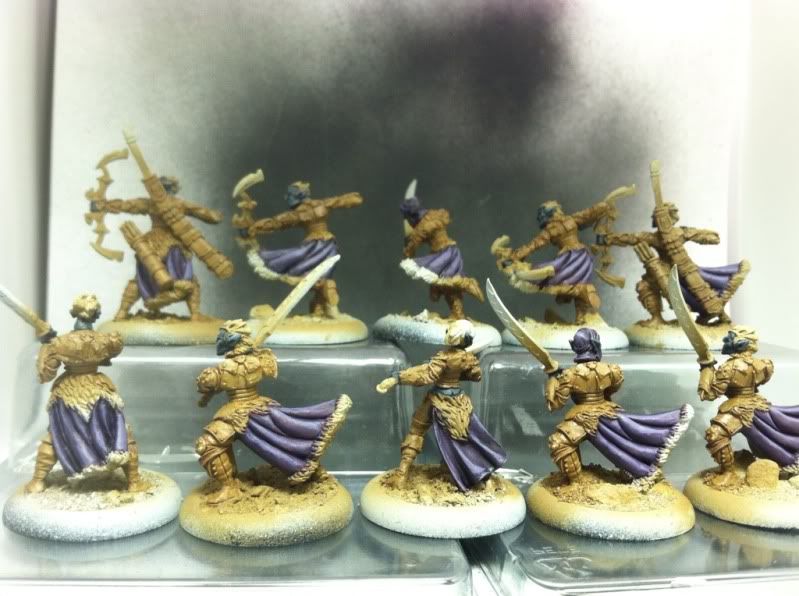
Essentially I have brought the highlights up on the armor, started by adding just a straight Vallejo Model Color English Uniform to all of the leather areas.  Then I began adding P3 Menoth White Highlight to the English Uniform more and more with each layer.  After three layers this is what I came up with.  Also began bringing the highlights up on the purple as well.  Did this by adding P3 Menoth White Highlight to the basecoat of GW Foundation Hormagaunt Purple.


I then added the metallics and got the hair finalized.  With the metallics I began by basecoating all of the areas with a Rackham Polished Silver, after basecoating, I washed the swords with GW Asurmen Blue Wash, I added a GW Nuln Oil wash to the hilts and handles of the swords.  I then washed the metallic portion of the bows with GW Gryponne Sepia... decided I didn't like it and followed that wash with a GW Nuln Oil wash as well.  The hair was base coated with a Delta Ceramcoat Quaker Grey and washed with GW Nuln Oil. After the wash on the hair dried I reapplied the base coat.  Here are the results:


Sorry for the pics... I have had one heck of a time getting a good group shot of these guys.  When I finish I will try to get a really nice set up so that the pics are more crisp.  But for now this is all I have.

Hope you like it!

Thanks for watching!!!

-Grim

Wednesday, February 27, 2013

Miniatures Showcase


Here is a showcase of the recently painted commission pieces for our local Pressganger. These were painted by Grimwolf and Scottykhan of Geek Garage. Miniatures featured are from the game Warmachine and faction is Khador.
Soundtrack:
Space 1990 by Kevin MacLeod
(incompetech.com)
Licensed under Creative Commons: By
Attribution 3.0
http://creativecommons.org/licenses/b...

Monday, February 18, 2013

Grim's IMC Prize Support


Alright folks in case you didn't hear, we here at Geek Garage are currently sponsoring the Inter-Mountain Cup, IMC, this is a Warmachine/Hordes tournament, this year it happens to be a Warmachine Weekend Qualifying tournament as well.

We as a crew here at the Garage decided to offer up some support for our local press gangers.  So we did what we love best... Painted some figs.  We will be using these painted figs as prize support during the tournament, some will be raffled end of the later rounds of the tourney and others will be given away to best painted army, and best painted battle group.

All in all this should be a whole lot of fun.  We hope to have a long and fun partnership with the IMC.

Now with that said here is my entry:


Click the link for some progress shots... these guys are clearly still WIP... click the link drop a comment, question, critique, anything really.


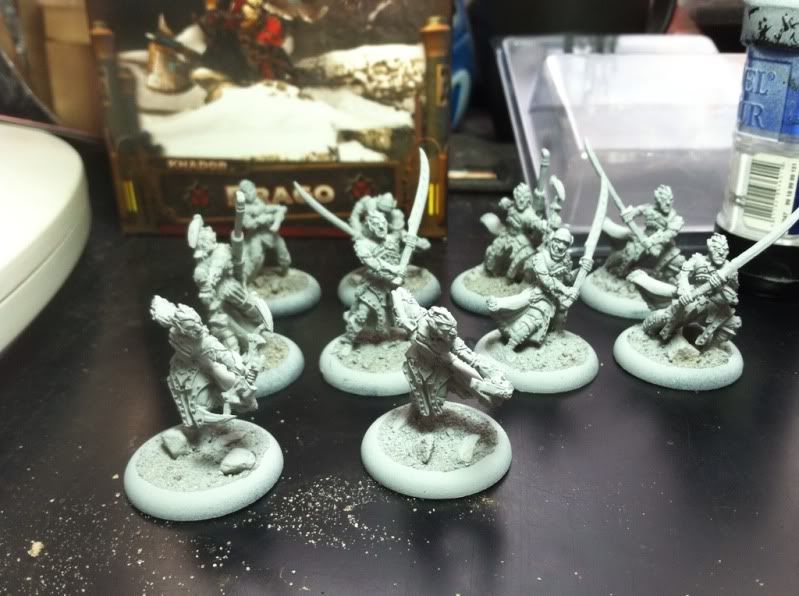
Here they are assembled (PAIN IN THE A--! Anyone who has assembled these can most likely relate) and primed.


I recently acquired an airbrush... so I decided to throw down an english uniform progression on these guys for their armor. Threw some VMC English uniform in my airbrush and laid down a base coat, then I just bit by bit added Menoth white higlight... three layers later here's the result:


Then I washed the models with the new GW wash Seraphim Sepia... think this may have lost a bunch of the highlight... Im most likely going to have to go back and bring some highlights up on the leather armor.


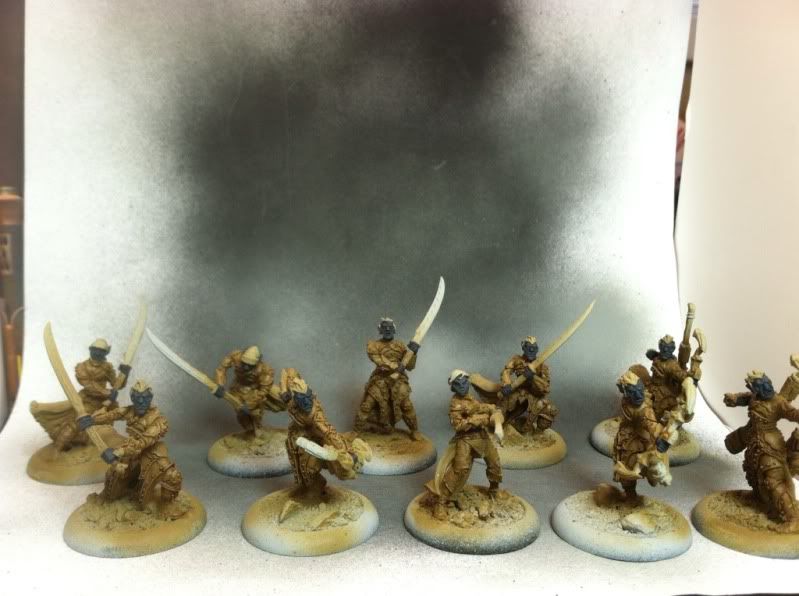
Was really having some issues trying to figure out how to paint these sweet little elves, different from the norm, but still cool as ice!  I had a few theories, asked ol' Scotty what he thought about it... He confirmed that painting them up as Drizzts kin (Drow from WotC), and if you don't know who Im talking about... go to the bookstore and look up R.A. Salvatore and buy the Legend of Drizzt volume 1... pretty sure you won't regret it.  Anywho... here is the shot with the skin tone base coated with VMC German Grey:


Decided on purple for the cloaks... Used the old GW Foundation Hormagaunt purple as a base... then washed with GW wash Druchii Nightshade.  Added one highlight of GW Foundation Hormagaunt purple.

As of now I have finished the highlighting on the skin, added a Delta Ceramcoat Ocean Reef Blue to the VMC German Grey for the first highlight, then added a little P3 Menoth White Highlight to that for the final highlight... here is the final shot for now:


More to come so stay tuned!

Thanks for watching!

-Grim

Thursday, December 6, 2012

Thursday WIP's

Well this is both a Thursday WIP and Part 2 of the Extreme Jack Commission!

Here is a brief write up of my adventures with the sweet and sexy Extreme-oth:

Been working on this commission for a buddy.

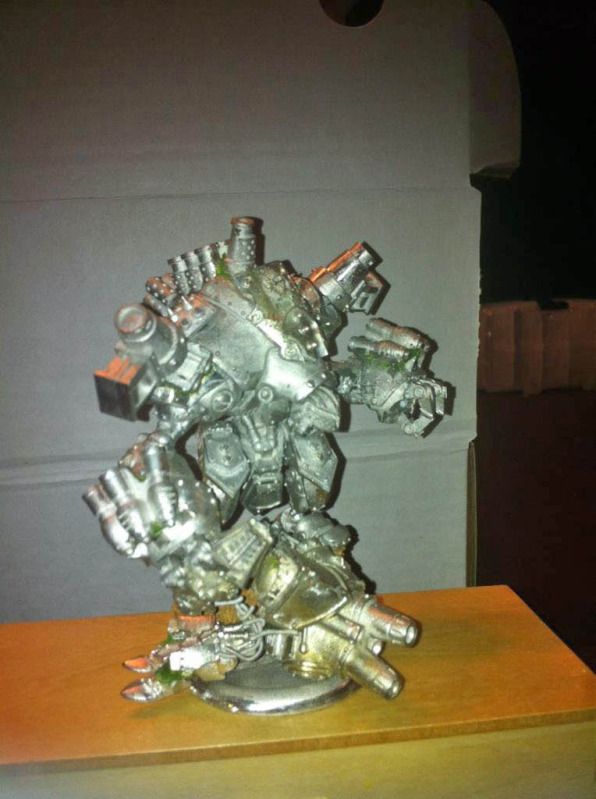
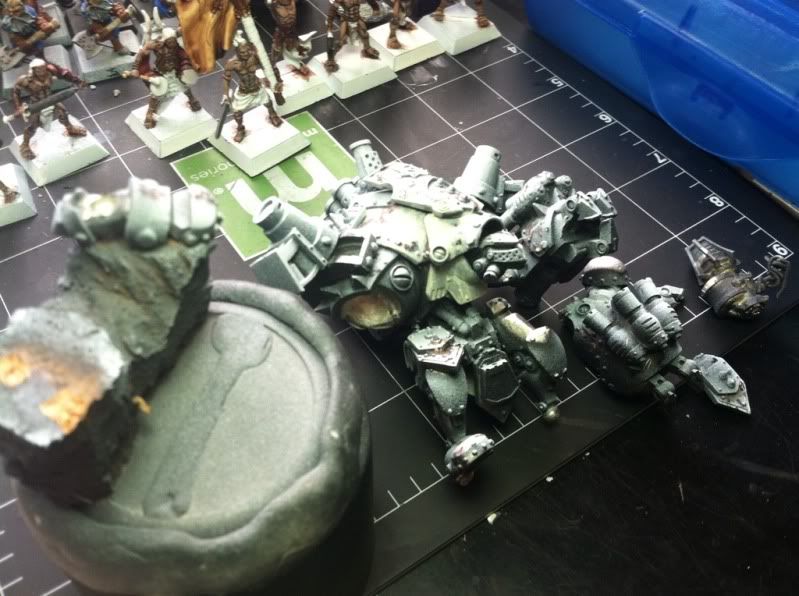
He did all of the converting and asked me to paint it for him.  Here is a pic of the starting point:


His instructions were pretty simple... "Don't care about the color scheme, I just want him to look filthy."  Simple enough, I thought.  Lots of room for artistic license always makes me happy :)


  You know you want to see more....


With this guy I decided to try a new technique, kind of my own take on a salt weathering technique that is a three layered primer effect... let me explain:
1) I began by spraying the model with a rust colored automotive primer (sorry I didn't snap pics of the priming stages... kind of did it on a whim real quick like :) ) 
2.) After allowing the rust colored primer to dry, about an hour or so, ( I would probably suggest you wait longer, but I happen to be extremely impatient) I applied the salt.   Here is how I went about my salt application:  I grabbed some of my wife's hair spray and sprayed into an open Privateer Press blister to get a nice pool of liquid hair spray.  At this point I grabbed a gnarly old brush and began slopping hairspray on the areas I wanted to show the chipped weathering.  I then sprinkled Kosher salt (big ol' salt grains) on the hairspray. 
3.) After allowing that to dry a bit, I waited a half hour... I again primed the model, this time with black primer.  I did this because I knew I would have some areas that were red in color, rust chips wouldn't show as well with the red paint. 
4.) I allowed the black primer to dry and repeated step 2.
5.) After allowing that to dry I came back with a white primer, spraying from the top mainly. 
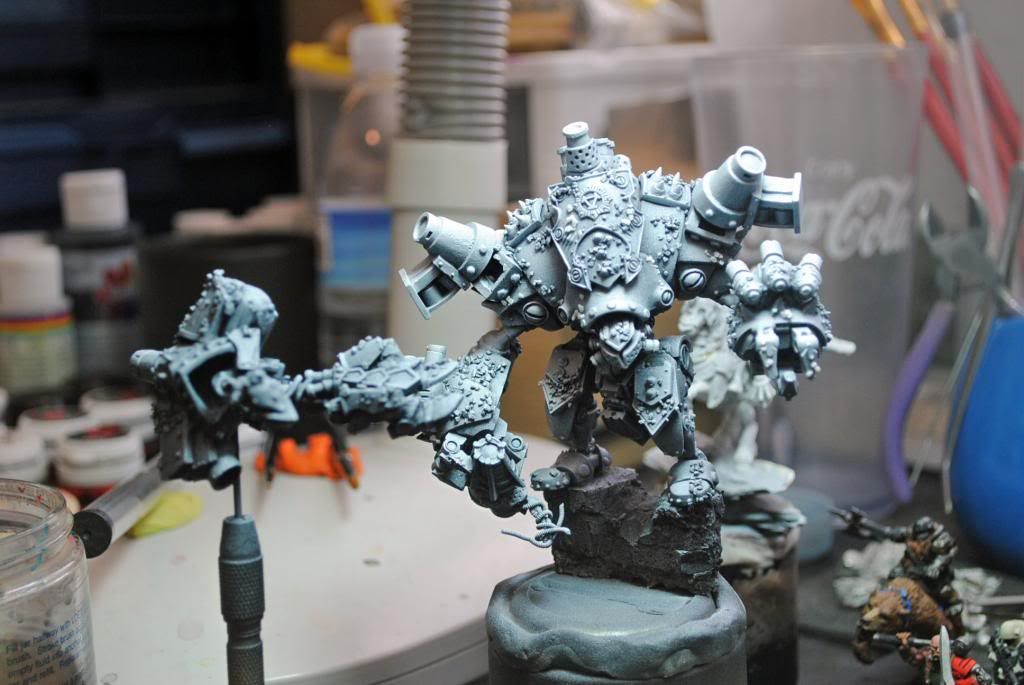
Here is a picture of the model after the three primer salting technique:


I sat and let this sit and dry for a bit and went and had a game/paint night with some buddies, and talked with them a bit about the salt weathering techniques etc...  I was informed that letting the salt sit for too long may eat through the hairspray and possibly the pewter...  Getting a bit shaken by that as soon as I returned home from paint night I promptly began brushing the salt away... at first with a toothbrush (it wasn't working as well as I had hoped) then with my fingers and finally I started using a hobby knife as some of the salt was just being stubborn!  Here is what it looked like when I finished.

So as you may have noticed on the Menoth Jack... (the torn up jack that is part of his base) I decided to test the theory and base-coated the jack before I removed the salt.  Still up in the air on weather or not you should pluck the salt before you paint or not. (Side note: If I owned an airbrush, I would have airbrushed the colors before I removed the salt)


Moving on.... As I began to paint this guy tragedy struck! While trying to paint the underside of some of his armor I heard a *CRACK*, I had zero time to react and... well... Behold the pitfalls of Zip-Kicker:

This model was sooooo top heavy, and my buddy is super fond of the zip kicker... he even has a tendency to gob super glue and zap it to get things assembled.  If you look closely at the model you will notice this in a few places.

After apologizing profusely to my wife and children for the tirade of profanity that boomed from my painting table, I picked up the pieces and reassembled this guy a bit... to be honest it actually helped me to get some harder to reach spots.  Here is another quick update of the painting after the tragedy.


Just the base coats for the armor colors have been laid... mainly so I could see if the color scheme was going to work.


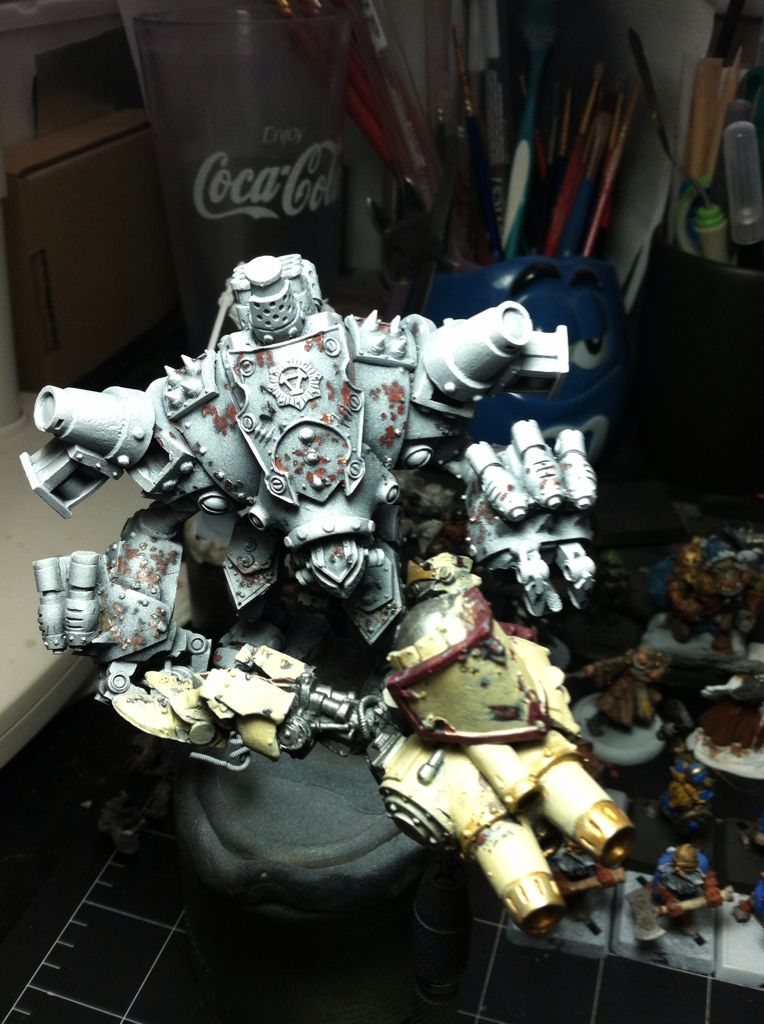
 OK, now here we are, added some highlights did the metallics, and began slathering this guy with washes. Black washes on the behemoth himself, Devlan Mud washes all over the Jack for the base. Here's a pic:


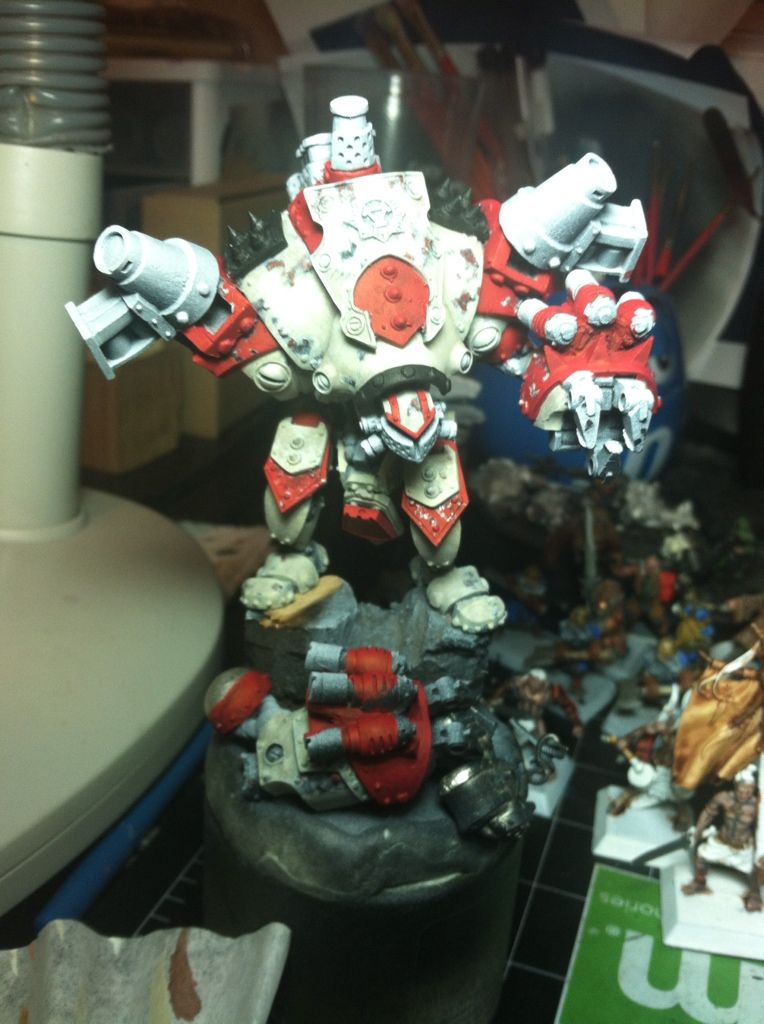
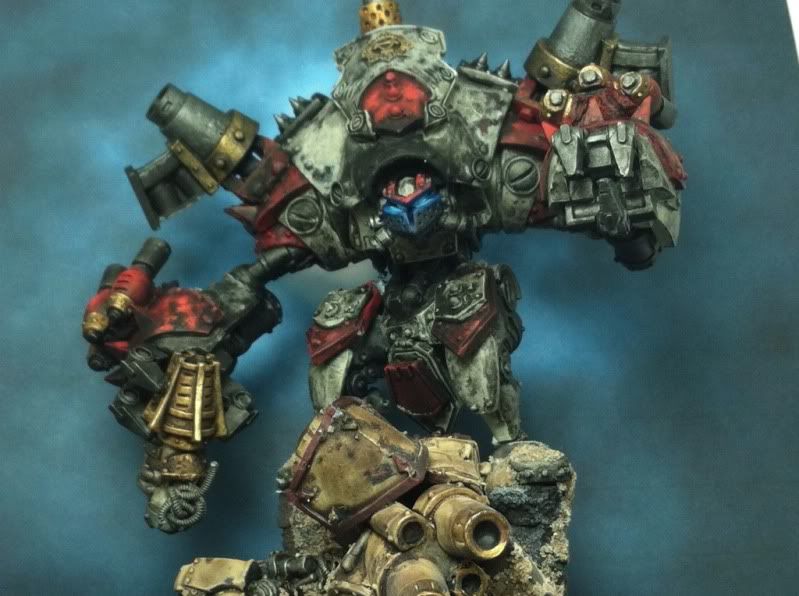
Added some finishing touches and at this point he is nearly finished... Need to add a little bit of pigment and apply the finishing touches to his base.


So what do you think?

Working on this guy has been a blast, while there were a few times I was ready to rip my hair out all in all a great experience.

I will finish the base up real quick and then throw a final round of pics up here in the next few days.

But until then

Thanks for Watching!!

-Grim

Tuesday, November 13, 2012

IKRPG: Vasily

This past weekend we had our first encounter with the Iron Kingdoms campaign. This was very much a learning experience as my total amount of Warmachines equates to two games. The mechanics are very easy to learn and the play was very smooth. Here is who I brought to the fight:

Vasily
Human, Khador, Arcane Mechanik/Man-at-Arms

Thoughts on this character is that he is more of a supportive class. His primary role is helping with repairs to Steamjacks or creating new Mechanika items for the party. Being a Will Weaver allows him to run magic spells a little more forcefully than a Focus Caster (as long as he doesn't fail a Fatigue roll) and his Arcantik Bolt spell is useful for shutting down enemy Steamjacks. With his Polarity Shield spell any charges against his front arc are canceled and his Defense Line ability adds +1 to his ARM while in base-to-base with a friendly character. This lets him act as a nice decoy when in city terrain. 


Background
"Former member of the Khadorian Special Recon group, a squad designed to learn the enemy forces' rune magics so to better protect the motherland. Trained in the arcane and close quarters combat these individuals  were sent behind enemy lines to gather intel. After a ambush in a old Orgoth ruin he was left for dead by his squad after falling into a crypt during their retreat. Surviving by his will Vasily sets out to continue his quest to learn new runes and avenge his fallen brothers."


The base sculpt of the miniature is a Widowmaker Marksman. After cleaning off any mold lines, I spent some time with a chisel and file removing the fur trim on the bottom of his great coat. After that I used a mix of miliput and super sculpey and created armor plates, the cobblestone base, and the shield. The head was swapped out for eIrusk and the trencher knife came from pStrakhov.


Sunday, November 11, 2012

Part 1 of 2 Extreme Jack Commission

Alright, I was finally able to finish off ol' Extreme Torch for my buddy Trevy.  Handed him off last night...  One part of the Massive Extreme Jack Commission Complete.  Now on to the second (and most intimidating) part of the commission.

First up some pics of Torchy:


More pics and angles... Plus a sneak peak at Part 2!!  Keep reading!


This guy was really fun to paint, and I think my buddy was happy with the result.  I had a lot of fun working with red on this particular model.  Red can be hard to work with at times... I think I achieved and acceptable result using the red.  (Sad thing is I don't keep track of recipes... Im all over the place, I just start throwing colors on my palette until they look right) NOt sure if I will be able to replicate it :(

Well thanks for watching!!

-Grim


Ahhhh, right, can't forget the sneak peak :P ;)

Extremoth (Yup thats a Vanquisher that will be on his base!  Yikes!)


Thursday, November 8, 2012

Thursday WIPs!

Man oh Man!  It has certainly been a hectic couple of weeks for this guy.  Trying to squeeze hobby time in has become increasingly more difficult.  Thank Goodness for Thursdays!!

I was finally able to slap a little dab or two of paint on my IKRPG figure.

Here is what I have got so far.  Hoping to finish him up tomorrow night so he will be all ready to take his first adventure in the Iron Kingdoms.

Here ya go  GRIM ULTHAS:

 More pics


There he is, still need to finish up a few details highlight a bit more and he will be ready for the table.

Thanks for watching!

-Grim

Monday, October 29, 2012

IKRPG: Grim Ulthas

As a group we have decided that we were going to jump into and start playing the new IKRPG.  Our lovely Happy Panda has issued a challenge to the members of the GG.

I gladly accept your challenge sir!  En Garde!!

I started with character creation.

In the new IKRPG the first step to character creation is to choose your race.  My choice: Dwarf! (anyone suprised by my choice?) Step Two is to choose an archetype: I picked MIGHTY... I mean he's a Dwarf for crying out loud, didn't think there was another choice. :)

Next you choose your careers:  Decided on a Military Officer/Bounty Hunter.

Then you name your character and start picking up equipment and the like:

Name- Grim Ulthas
Tailored Plate armor
Mace
Warhammer
Knuckledusters

So with the character creation out of the way I went about picturing in my head how I wanted my character to look on the table top.  I began by scribbling out some concept art:


The Ulthas brothers are ex-Rhulic military that have fled to North Eastern Khador to start up a Mechanik's shop.

As they are located in the cold north, I figured it only fitting to make my dwarf look a tid bit like a Rooskie.

So here is my concept.


Now on to figure selection: As a military officer I thought that the best base for a Dwarven military officer would have to be the new General Ossrum fig. I picked him up and began looking for options to match my characters load out.

So starting with Ossrums body I grabbed the right arm off of my recently acquired Gorten Grundback fig... (going to be ordering another right arm from the PP bits order to replace it :) ) clipped the head off his axe and added a mace head, filed his warcaster back pack down to look like a normal back pack and clipped off his pipe... end result:


I really wasn't sure how I felt about the mace.  I bounced the idea off of my good buddy and blog contributor Scotty.  I felt the mace looked a bit too much like a stick grenade.  He thought if fit the IK pretty well, but also agreed it had some stick grenade feel to it as well.  So after a bit of deliberation I decided to switch it up and this was the result:

I also forgot to note that I have added a few bits and pieces to the Ossrum fig as well.  Three pouches on his back, and two rolled up scrolls.

As a Military officer you start with Battle Plan: Call to Action and have access to several more Battle Plan abilities.  I figured to represent these Battle Plans I would add maps and intel-type scrolls to my figure.


Step 1


So with the bits all attached and the figure nearing completion there was only one thing left to do...  Yup you guessed it... Give him a right Dwarf-worthy beard.  And so it began, my first stop in the beard building process:

Step 2


I then thought to my self that maybe this beard was a bit to rough... might be hard to paint... So I moved on to step number 2:


Step 3


I decided to run this by Scotty as well... his thoughts were that it may have looked a little bit better a scruffy and unkempt... then he threw in a bit of a challenge to test my Green Stuffing abilities... told me to throw a ring of some sort on his beard to break up all the scruffy beardliness.  So I moved to step 3:


I did a bit more tweaking here and there... until the green stuff was essentially no longer workable.  And ended up with this as a final product:


Well thats it for the conversion part!  Next step:  Basing and Painting!

Thanks for Watching!!

-Grim